


An LED panel that suits an open office may not suit a classroom or retail floor, even when the nominal size and wattage are identical.
The three applications differ in visual tasks, viewing directions, operating schedules, ceiling conditions, color priorities and control needs. Selection should therefore begin with the room and project brief, then move to the exact luminaire’s photometric, electrical and installation data.
Use this guide to build a specification that suppliers can answer with evidence. For an overview of the available form factor, visit the New Lights LED panel light category.
Start with the application, not the panel wattage
Collect the following inputs before choosing a product:
- room dimensions and ceiling height;
- ceiling grid, gypsum ceiling, exposed structure or suspended system;
- workplane and critical visual tasks;
- furniture, shelving, screens, whiteboards and display locations;
- wall and ceiling reflectance;
- daylight direction and operating schedule;
- control, emergency and monitoring requirements;
- maintenance access and cleaning conditions;
- destination market and project standards.
Wattage shows electrical input. It does not show light output, distribution, glare, uniformity or wall illumination. A project specification based only on “40 W panel” leaves most design questions unanswered.
How office, school and retail priorities differ
| Application | Primary planning priorities | Common review points |
|---|---|---|
| Office | Task visibility, screen comfort, uniformity, vertical brightness and controls | Workstation layout, reflected glare, wall light, daylight zones, occupancy schedule |
| School | Desks, boards, faces, flexible teaching modes and control access | Whiteboard reflections, teacher/student sight lines, flicker evidence, scene control, maintenance |
| Retail | Merchandise appearance, circulation, visual hierarchy and flexible layouts | Color quality, vertical display light, contrast, shelf changes, ambient/accent coordination |
This matrix does not define universal numerical targets. Those come from the project brief, applicable guidance and a calculation using the selected luminaire. Kitchens introduce another combination of task, cleaning and ceiling constraints; the commercial kitchen panel-light guide provides a focused example.
1. Confirm panel size and mounting method
Nominal panel dimensions often coordinate with common ceiling modules, but the actual product dimensions, thickness, driver arrangement and mounting accessories must be checked.
Possible mounting methods include:
- recessed installation in a compatible grid;
- surface mounting with a purpose-designed frame;
- suspension with an approved cable kit;
- recessed installation in a cut opening with an approved mounting system.
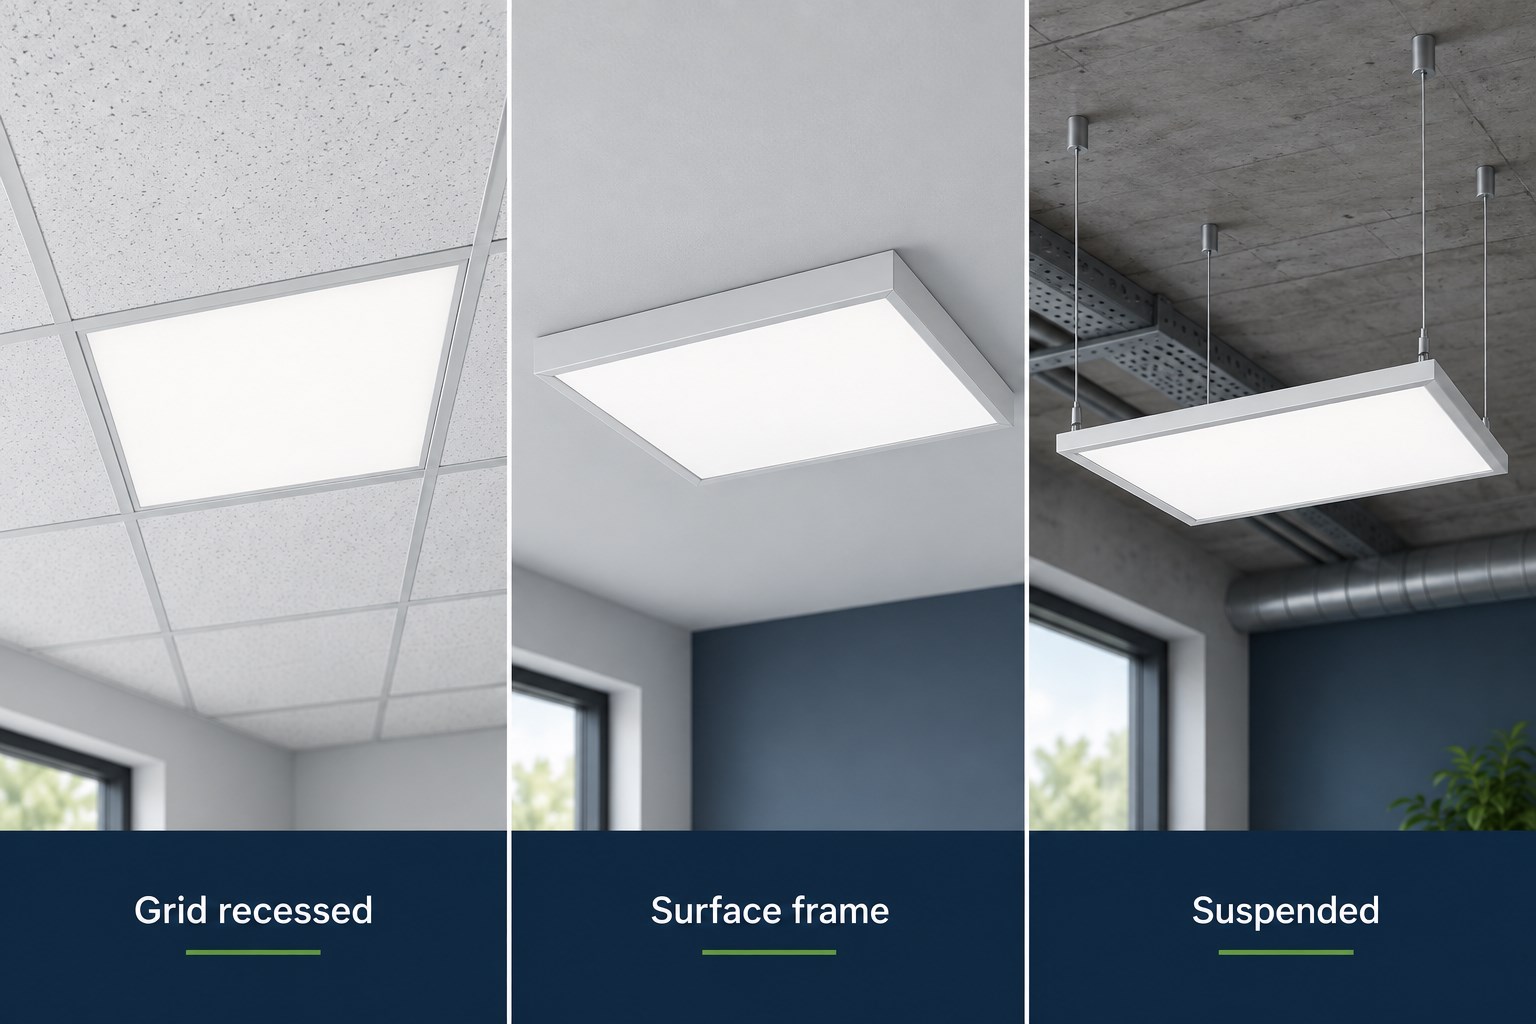
Do not treat these as interchangeable. Verify load support, clearances, plenum access, driver location, seismic or project requirements and service access. A panel sold in the same nominal size as a ceiling tile may still need different support or electrical arrangements.
For retrofit projects, inspect the existing ceiling and luminaire condition before ordering. DOE guidance identifies ceiling-plenum access, existing components, desired photometry, budget and long-term goals as relevant upgrade factors. If the ceiling design is still being decided, compare the roles of panels and downlights in the ceiling-lighting planning guide.
2. Compare lumens and distribution together
Total lumens are important, but they do not explain where light reaches the room.
Request the photometric file for the exact model, wattage and optical option. Use it to evaluate:
- horizontal task illuminance;
- uniformity across work or circulation areas;
- vertical light on faces, walls, boards and merchandise;
- brightness between luminaires;
- spill into screens or reflective surfaces;
- the number and location of panels needed.
DOE warns that a change in LED distribution can increase glare, create uneven task-area levels or reduce wall illumination. It recommends calculations or mock-up measurements to assess the result below and between luminaires.
A lumen value without distribution data cannot establish layout quality.
3. Treat glare as a room result
Panel luminaires have a comparatively large luminous area, but that does not guarantee visual comfort.
Glare depends on luminance, luminaire size, location, viewing direction, room geometry, surface reflectance and contrast. CIE’s UGR method combines luminaire, position and viewing-condition factors. A stated UGR value is meaningful only with its test or calculation conditions. It should not be copied into every room as if it were independent of layout.
Review office panels from seated screen positions, classroom panels from desks and toward the teaching wall, and retail panels along the normal customer path. A mock-up can reveal diffuser brightness, ceiling contrast and reflections that are difficult to judge from a product photograph.
4. Choose color for the task and the surrounding design
CCT describes the warm or cool appearance of white light. CRI is one measure of color rendering. Neither should be selected in isolation.
For offices, coordinate the white appearance across open areas, meeting rooms and circulation. For schools, consider boards, printed material, skin tones and adjacent daylight. For retail, review the actual merchandise colors and finishes under representative samples.
If the project needs stronger color discrimination, ask for additional color-quality data rather than assuming a high headline CRI answers every question. Define tolerances for color consistency across the order and any future replacements.
Color-changing or selectable-CCT panels introduce another control and commissioning boundary. Record the approved setting and prevent accidental changes after handover where consistency matters.
5. Request flicker evidence instead of a label
“Flicker-free” is often used without stating the measurement method, operating condition or threshold.
Ask the supplier for test data that identifies the exact driver and luminaire configuration, input supply, dimming level and metrics used. DOE’s flicker research describes waveform-based measurement and the need for documented metrics. Review behavior at full output and across the required dimming range.
This is especially important where occupants use screens, cameras or sensitive visual tasks. Project and market requirements differ, so define the applicable metric and limit first, then request traceable evidence against that requirement.
6. Match the driver and controls to the project
Panel performance depends partly on the driver. Specify:
- input voltage and frequency;
- power factor and harmonic requirements where applicable;
- dimming or control protocol;
- required minimum dimming level;
- sensor and building-management interface;
- standby behavior;
- emergency-lighting arrangement;
- driver location and replaceability.
DOE’s commercial troffer guidance discusses occupancy, vacancy and daylight-responsive controls, but also notes that controls do not work with every retrofit product. Verify the complete chain: luminaire, driver, sensor, controller, wiring and software where applicable.
Do not assume that a dimmable driver is compatible with every dimmer or that a sensor-ready product includes the sensor.
7. Plan emergency lighting separately
An emergency option can change driver architecture, battery location, wiring, testing, indicators, operating duration and certification scope.
Identify whether emergency lighting is provided by selected panels, separate emergency luminaires or a central system. Then verify the exact model, emergency module, output mode, battery, test method and required documentation.
Do not add a generic emergency pack after product selection without checking thermal, electrical, enclosure and certification compatibility.
8. Review maintenance and lifetime evidence
LED panel service may involve replacing a driver, light engine, complete luminaire or accessory. Ask what is field replaceable and how the panel is removed without damaging the ceiling.
Lifetime claims should state the component or system, metric, test basis and operating conditions. A long LED package projection does not automatically establish driver life or complete-luminaire service life.
For schools and offices, consider whether maintenance can occur without disrupting occupied spaces. For retail, consider appearance continuity if one panel is replaced later. Retain approved model, driver, optical, color and finish information to control substitutions.
9. Build a model-level evidence package
A commercial quotation should be supported by:
- exact model code and configuration;
- datasheet and dimensional drawing;
- installation instructions and mounting accessories;
- IES or other applicable photometric file;
- electrical and driver data;
- dimming/control compatibility information;
- color and flicker evidence;
- emergency option documentation where required;
- certification or test records for the destination market;
- model-to-document scope and change-control process.
DOE’s FEMP purchasing guidance treats commercial luminaire categories through defined procurement criteria. A private or international project may use different requirements, but the principle remains: establish criteria and verify the exact product against them. A supplier comparison should make the evidence easy to audit:
| Field | Evidence to request | Decision supported |
|---|---|---|
| Identity | Exact model and configuration code | Prevents evidence from a different variant being substituted |
| Mechanical | Dimensioned drawing and approved mounting accessory | Confirms ceiling fit, support and service access |
| Photometric | IES or equivalent file for the exact output and optic | Supports layout, uniformity and glare review |
| Electrical | Driver, input and control data | Confirms supply and control-system compatibility |
| Light quality | CCT, color data and tolerances | Supports appearance and order consistency |
| Temporal behavior | Flicker data across relevant operating states | Supports screen, camera and sensitive-task review |
| Emergency | Module, output mode, duration and applicable documentation | Separates emergency configuration from the standard panel |
| Compliance | Destination-market documents with model scope | Confirms which configuration the evidence covers |
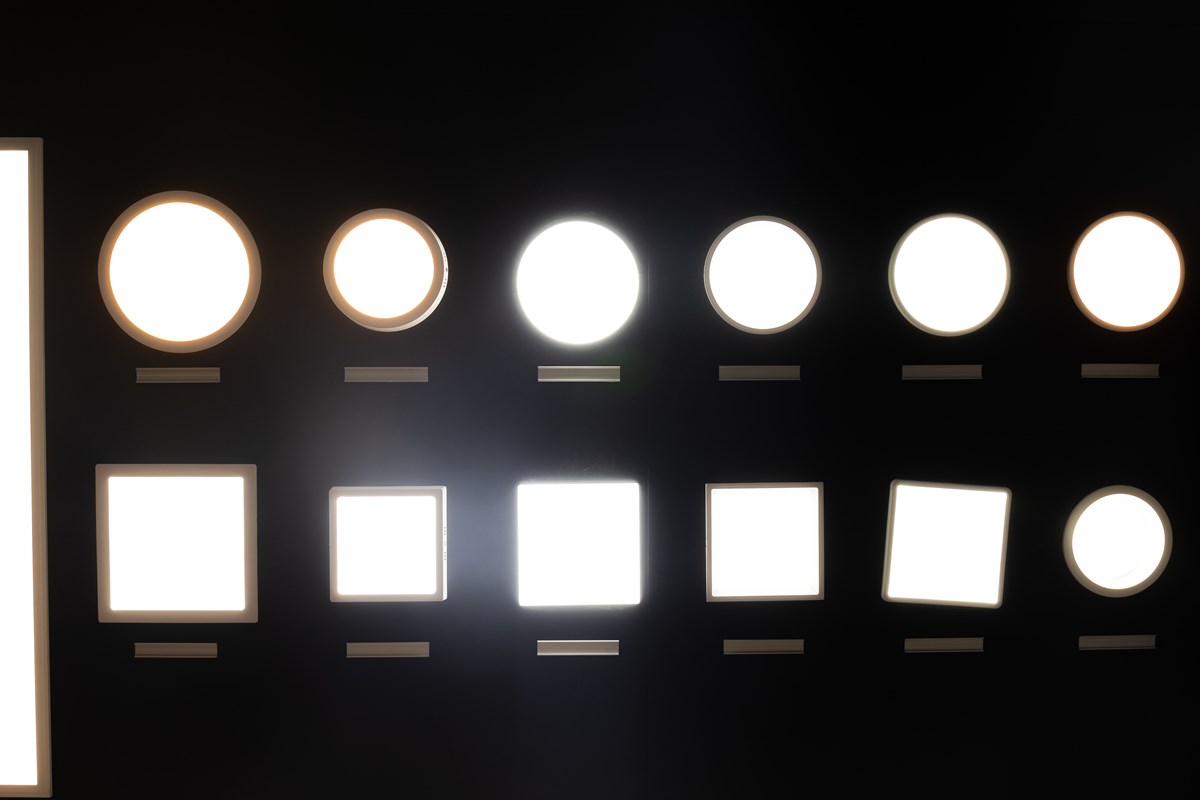
For New Lights manufacturing and project-support context, review the factory and manufacturing page.
A practical selection workflow
- Define room, task, ceiling and project requirements.
- Select a mounting concept and nominal panel family.
- Shortlist exact models with complete photometric and electrical data.
- Calculate the layout using verified files.
- Review task light, walls, boards, merchandise and glare viewpoints.
- Confirm CCT, color quality and order consistency.
- Verify driver, flicker, controls and emergency configuration.
- Review installation and maintenance access.
- Build a representative mock-up when visual or project risk warrants it.
- Approve a change-controlled sample and documentation package.
To request model-level support, contact New Lights with the room plan, ceiling system, target tasks, operating schedule, control requirements and destination market.
Frequently asked questions
What wattage LED panel should an office use?
Wattage alone cannot answer the question. Use the target tasks, room geometry, panel lumens, distribution, layout and controls to determine the system.
Is one LED panel specification suitable for offices and classrooms?
Not automatically. Screen positions, boards, faces, control modes, schedules and project requirements can differ.
What UGR should an LED panel have?
Use the project requirement and evaluate glare in the actual room and layout. Do not treat a catalog UGR statement as a universal room result.
Which CCT is best for retail lighting?
There is no universal value. Review brand atmosphere, merchandise, adjacent lighting, color quality and customer experience with representative samples.
How can I verify that a panel is flicker-free?
Request test data with the metric, method, operating condition, driver and dimming level identified. A marketing label alone is insufficient.
Can a recessed panel be surface mounted?
Only if the manufacturer provides an approved surface-mount method or accessory for that model. Verify support, wiring, driver space and certification scope.
Do all LED panels work with occupancy sensors?
No. Verify the driver, sensor, controller, load, wiring and required operating behavior as a complete system.
Should every project use an emergency panel?
Emergency-lighting design depends on the building, code and project strategy. Confirm whether emergency illumination comes from selected panels, dedicated luminaires or a central system.
Editorial sources
- DOE guidance, U.S. Department of Energy / Better Buildings, “LED Retrofit Kits, TLEDs, and Lighting Controls: An Application Guide”: https://betterbuildingssolutioncenter.energy.gov/resources/led-retrofit-kits-tleds-and-lighting-controls-application-guide
- DOE, “LED Troffer Retrofit Lighting and Controls”: https://www.energy.gov/eere/femp/downloads/led-retrofit-kits-tleds-and-lighting-controls-application-guide
- DOE’s commercial troffer guidance, application guide PDF: https://betterbuildingssolutioncenter.energy.gov/sites/default/files/attachments/led_troffer_retrofit_guide.pdf
- CIE’s UGR method, “Discomfort Glare in Interior Lighting”: https://www.cie.co.at/publications/discomfort-glare-interior-lighting
- DOE’s flicker research: https://www.energy.gov/cmei/ssl/flicker-research
- DOE’s FEMP purchasing guidance, “Purchasing Energy-Efficient Commercial and Industrial LED Luminaires”: https://www.energy.gov/cmei/femp/purchasing-energy-efficient-commercial-and-industrial-led-luminaires












