


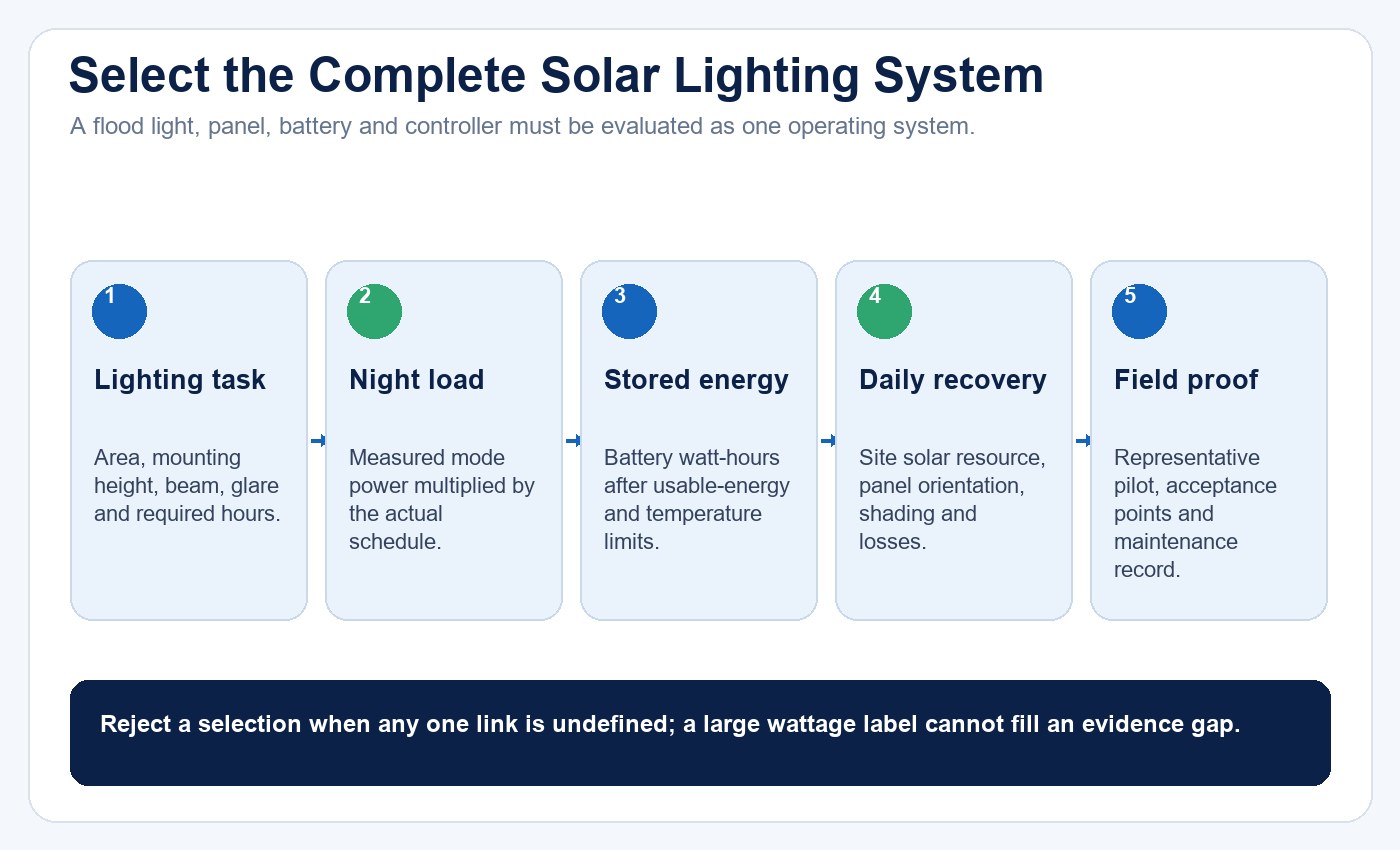
Select an LED solar flood light as a complete off-grid lighting system, not as a lamp with an impressive wattage label. The useful decision depends on five linked questions: does the optical system light the required area, what is the real nightly electrical load, how much energy can the battery deliver under the expected conditions, can the panel replace that energy during the weakest relevant solar period, and does the installed system pass a representative pilot?
This page owns the broad product-selection workflow. If the project already has a defined output profile and needs detailed watt-hour, battery, photovoltaic and recovery calculations, use the separate solar flood light sizing and runtime guide.
1. Define the Lighting Task Before Choosing a Model
Begin with the area and the activity, not the product label. Record the dimensions, mounting point, target surfaces, hours of use and whether the light supports orientation, access, perimeter observation, loading work or general visibility. These tasks do not need the same distribution or maintained illuminance.
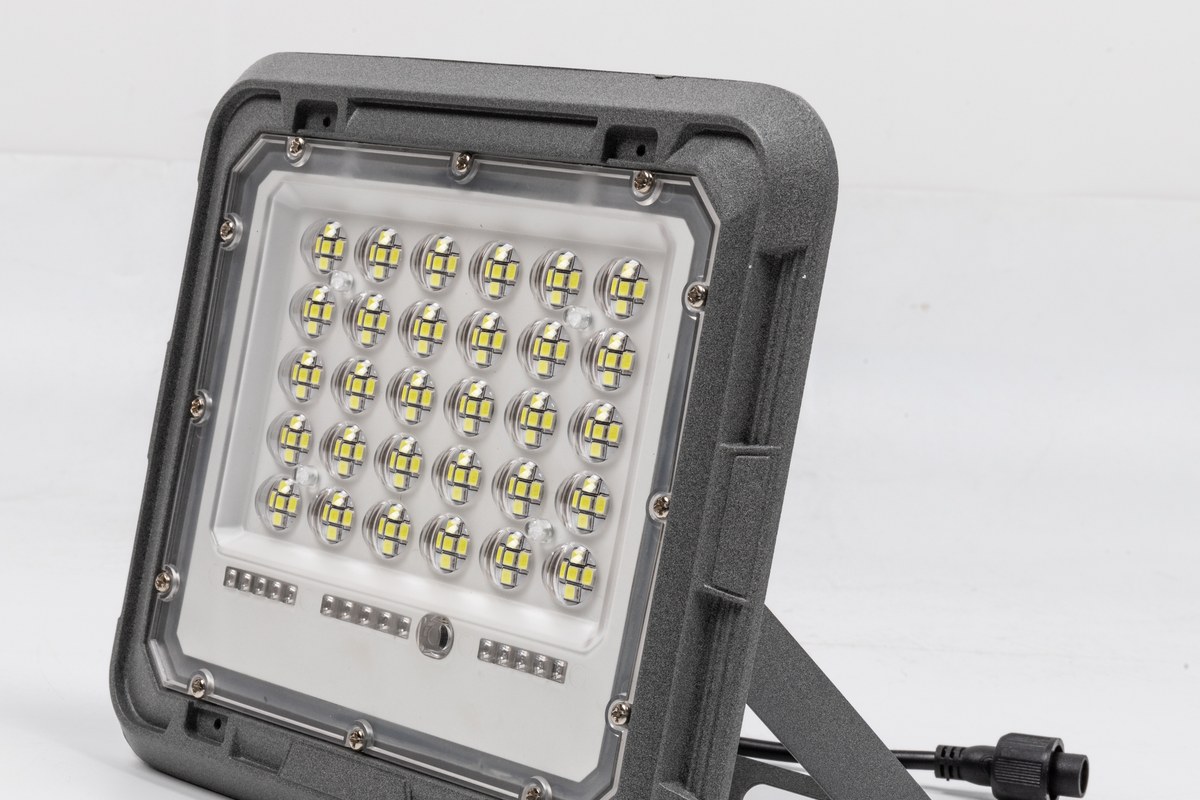
Lumens describe total output, but they do not show where that light goes. Beam shape, aiming angle, mounting height and surrounding reflectance determine the result on the ground. Ask for a photometric file or a measured distribution for the exact model, then identify the points where minimum, average and maximum illuminance matter. A bright product photograph cannot replace that evidence because camera exposure and scene composition are unknown.
Glare and spill light also belong in the decision. A model that creates a bright central patch may still leave important edges dark or send unnecessary light toward neighboring property. The LED floodlight fundamentals guide explains how distribution and application differ from a simple lumen comparison.
| Lighting input | Record before selection | Evidence to request |
|---|---|---|
| Task and area | Boundaries, activity and target points | Layout or marked site plan |
| Mounting | Height, setback, aiming range and obstructions | Bracket drawing and installation method |
| Light result | Minimum, average, uniformity and glare boundary | Photometric file or agreed sample measurements |
| Schedule | Continuous, timed, dimmed or motion-triggered periods | Controller mode table and measured power by mode |
2. Separate Marketing Wattage From Measured System Load
Solar-lighting catalogues sometimes place a large wattage number in the model name while listing a different actual power elsewhere. Those numbers must not be interchanged. Battery and panel calculations need the measured electrical demand of the complete operating mode, while optical comparison needs lumens and distribution measured for that same mode.
Ask whether the power value refers to the LED board, driver output, battery-side demand or complete system. If the light has several modes, record power and output for each one. A useful comparison table keeps model label, measured load, light output, panel and battery fields in separate columns.
Efficacy can only be calculated when the numerator and denominator describe the same configuration and test condition. Dividing one family-level lumen statement by a headline wattage can produce a plausible-looking but meaningless result.
3. Build the Actual Night Schedule
The nightly load is the sum of every operating segment, not the highest mode multiplied by a brochure runtime. A light may operate at full output for a short period, dim after a timer, increase after motion or step down when the battery reaches a protection threshold. Controller and sensor consumption also belong in the energy budget.
For motion-controlled sites, define both a typical and a high-activity case. An entrance used repeatedly through the evening can consume much more energy than a rarely visited path. If occupancy is unknown, the pilot must measure events or compare conservative scenarios.
| Schedule segment | Required input | Calculation role |
|---|---|---|
| Dusk start | Trigger method and initial mode | Defines when discharge begins |
| Timed period | Hours and measured watts | Establishes predictable energy use |
| Motion period | Standby watts, active watts, event duration and frequency | Creates typical and high-activity cases |
| Protection behavior | Step-down and cutoff thresholds | Defines usable service, not merely time until switch-off |
4. Compare Battery Energy, Not Capacity Labels Alone
A milliamp-hour value without voltage is not an energy value. Convert nominal capacity to watt-hours, then account for the battery chemistry, permitted depth of discharge, controller limits, temperature, aging allowance and conversion losses. The resulting usable energy is lower than nominal voltage multiplied by amp-hours.
The evidence package should identify the cell or pack configuration, protection circuit, charge and discharge limits, replacement route and conditions behind any runtime test. Do not transfer one model’s battery or runtime statement to a visually similar model. Even products with the same nominal LED power can use different panels, batteries, optics and control programs.
The detailed solar flood light sizing and runtime guide includes the calculation sequence for nightly watt-hours, usable battery energy, autonomy and recovery after weak-sun periods.
5. Evaluate Solar Input for the Weakest Relevant Period
A photovoltaic panel’s rated watts do not describe daily energy at the site. Collection changes with location, season, tilt, azimuth, shading, dirt, temperature and electrical losses. NREL’s PVWatts documentation likewise treats resource, array orientation and losses as model inputs and warns that estimates contain assumptions and uncertainty.
Inspect the proposed panel location over the hours that matter, not only at midday. Trees, roof edges, walls and equipment can remove morning or afternoon collection. Use a conservative design period rather than an annual average when the lighting task must work through a difficult season.
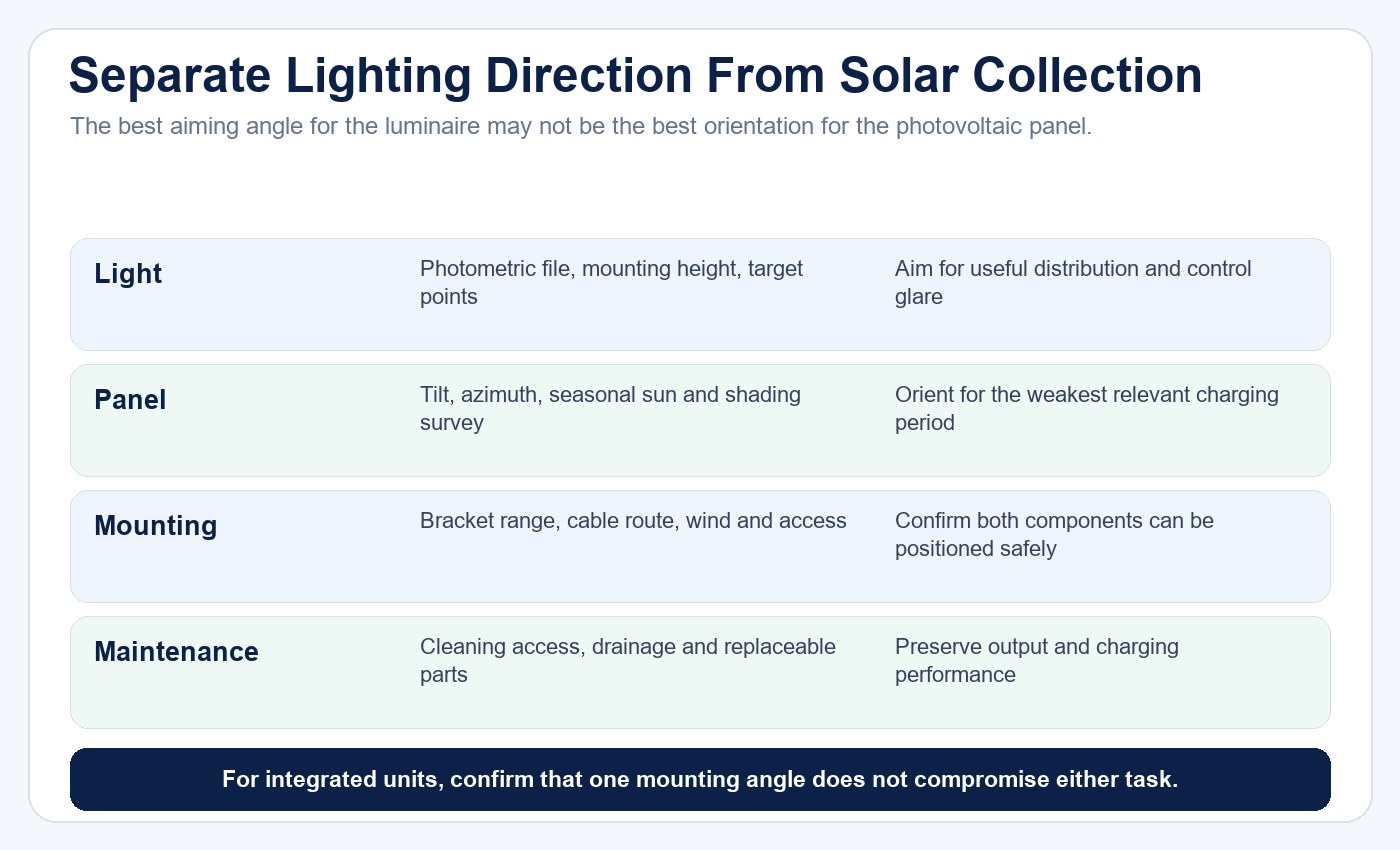
Panel orientation and luminaire aiming are separate design problems. A split system can position them independently but introduces cable length, voltage drop and connection details. An integrated system is simpler to install but may force a compromise between the direction of useful light and the direction of useful sunlight.
For a wider project view, the outdoor solar lighting procurement guide covers site evidence, supplier submissions and lifecycle planning beyond one flood-light model.
6. Treat Controller Modes as Part of the Product Specification
The controller manages charging, low-voltage protection, output levels and often timers, motion detection or remote commands. A remote-control photograph shows available buttons, but it does not establish the delivered program, electrical load or behavior after a low-battery event.
Request a mode table that states output level, duration, trigger, recovery behavior and whether settings persist after battery isolation. Confirm what “auto,” “3H,” “5H” or similar labels mean for the exact delivered controller. During sample testing, record the selected mode and any automatic changes instead of reporting only total time until the LEDs turn off.
| Controller question | Why it matters | Acceptance evidence |
|---|---|---|
| What starts and ends each mode? | Defines the real load profile | Current mode table and test observation |
| How does low battery change output? | Runtime may include reduced light | Output-versus-time record |
| Are remote settings retained? | A power interruption may alter operation | Restart and battery-isolation test |
| What happens after weak-sun days? | Protection logic affects recovery | Multi-day pilot record |
7. Check the Physical Product and Installation Boundary
The luminaire, panel, brackets, cable and connectors must suit the mounting environment. Review aiming range, fastener access, wind exposure, cable routing, drainage and cleaning access. If the panel is separate, verify cable length and conductor size for the intended route. If a field splice is required, define the connector and sealing method rather than improvising onsite.
An IP rating applies to specified test conditions and the tested configuration. It does not automatically establish resistance to immersion, salt, impact, every temperature cycle or a field-modified cable entry. Request the relevant report and confirm that the model, cable, connector and closure arrangement match what will be delivered.
Use the outdoor lighting installation checklist to record mounting, aiming, wiring, drainage and commissioning details before a rollout.
8. Compare Exact Models Without Blending Families
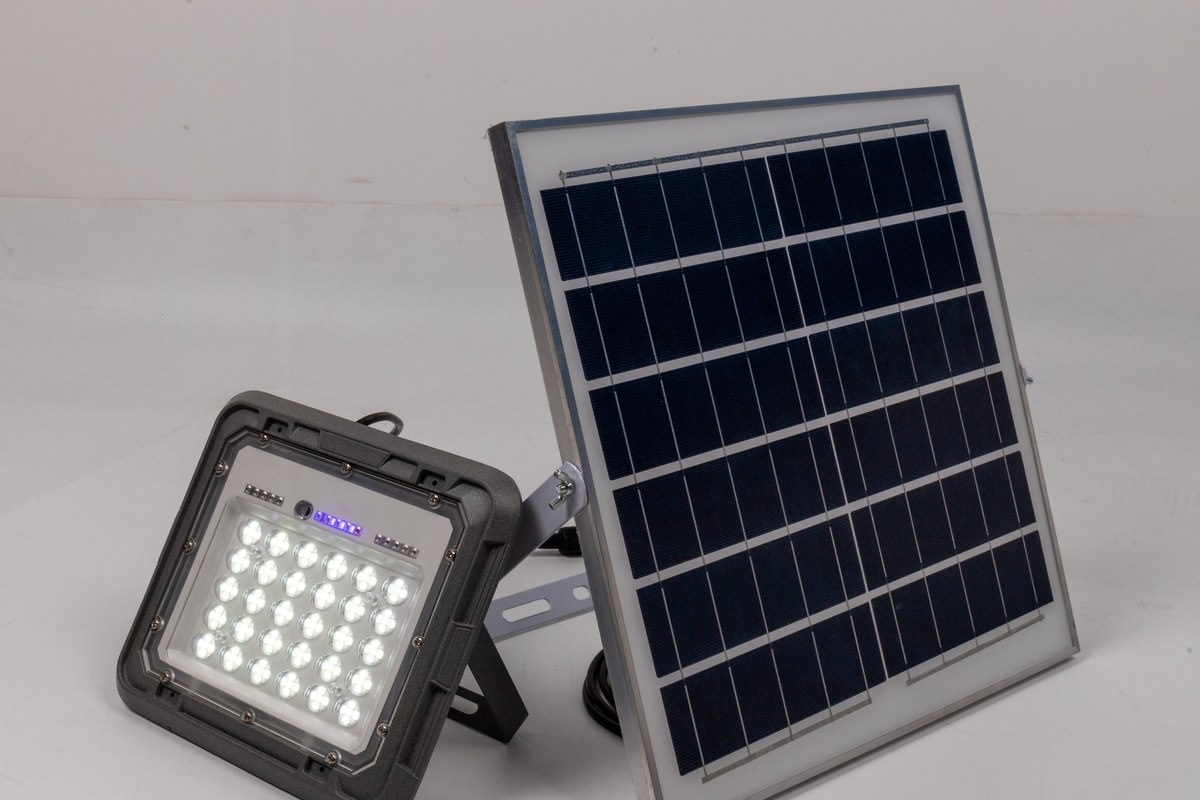
New Lights publishes more than one solar flood-light configuration. The current product page confirms an available solar flood-light family, while first-party product photography shows a split panel-and-luminaire arrangement. These sources establish product identity and physical configuration; the exact battery, panel, lumen, control and environmental values still need the current model datasheet and applicable reports.
| Comparison field | Keep model-specific | Do not substitute |
|---|---|---|
| Optical performance | Lumens, distribution, CCT and test condition | Product photograph or LED quantity |
| Electrical demand | Measured watts for each controller mode | Model-name wattage |
| Storage | Chemistry, voltage, capacity and usable limits | Amp-hours without voltage |
| Solar collection | Panel watts, voltage, dimensions and site model | Panel watts multiplied by daylight hours |
| Environment | Reported test scope and delivered configuration | IP label as a universal outdoor guarantee |
For broader application options, visit the outdoor, garden and solar lighting solution page.
9. Pilot the Complete System Before Rollout
Install production-intent samples at representative locations, including difficult shade, access or activity conditions. Record model identity, battery and panel configuration, controller mode, mounting geometry and starting state. Measure illuminance at agreed points at switch-on and later in the night.
The pilot should include weak-sun recovery, not only a clear-day demonstration. Observe step-down or shutdown behavior, motion-event frequency, charging recovery, cable and bracket condition, water entry or condensation, and whether glare or dark zones affect the task. Define the acceptance criteria before reviewing the result.
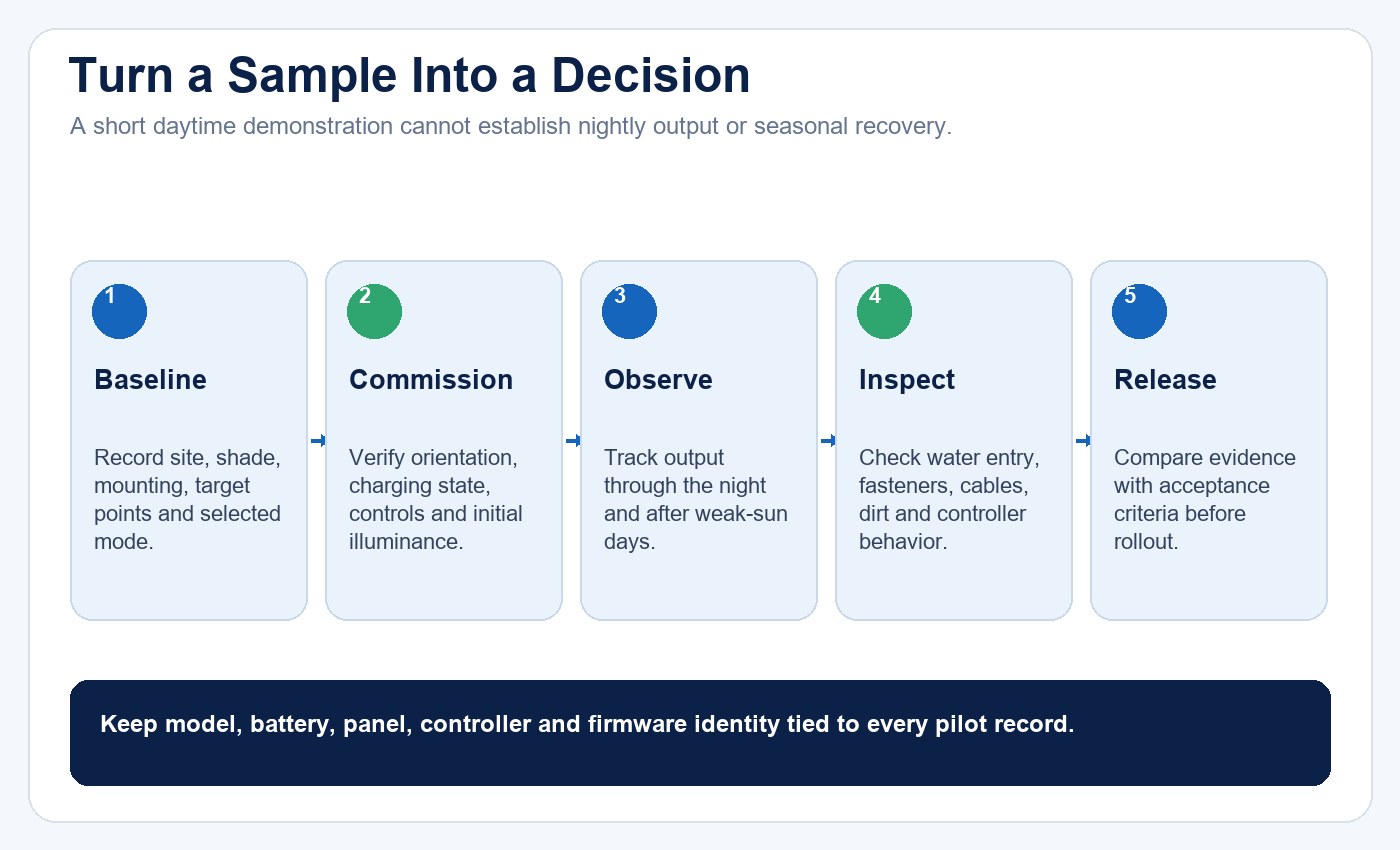
If the pilot exposes repeated charging, control, sealing or mechanical issues, preserve the records and link them to the exact configuration. The lighting maintenance and spare-parts guide can help define inspection and replacement responsibilities.
Procurement Checklist
Before placing an order, require a model-level submission containing:
- Exact luminaire, panel, battery and controller identity.
- Lumens, photometric distribution and measured power by mode.
- Battery chemistry, voltage, capacity and usable-energy limits.
- Panel electrical data and dimensions.
- Mode table, sensor logic, protection thresholds and restart behavior.
- Runtime test conditions and output-versus-time evidence.
- Relevant IP, temperature and environmental evidence for the delivered configuration.
- Brackets, cable, connectors, installation and maintenance instructions.
- Warranty scope, approved replacement parts and change-control process.
- Pilot plan with target points, schedule and release criteria.
Conclusion
The right LED solar flood light is the one that satisfies a defined lighting task and can repeatedly balance nightly demand with usable battery energy and site-specific solar recovery. Start with distribution and mounting, use measured system power, compare exact battery and panel data, treat controller logic as part of the specification, and validate the production-intent system at a representative site.
New Lights offers a current solar flood light product family within its wider outdoor and solar lighting solutions. For a project comparison, contact New Lights with the site dimensions, mounting height, required hours, control schedule and local solar conditions.
Frequently Asked Questions
Is the wattage in a solar flood light model name the actual power?
Not necessarily. Use measured system power for the exact operating mode and keep it separate from the model label, lumens and panel rating.
How many hours should an LED solar flood light run?
There is no universal number. Runtime depends on usable battery energy, operating schedule, controller behavior, temperature, starting charge and prior solar input.
Does a larger solar panel guarantee reliable nightly operation?
No. Panel orientation, shading, controller limits, battery capacity, system losses and the nightly load all affect whether the system recovers.
Should I compare batteries by amp-hours?
Only when voltage and configuration are also known. Convert to watt-hours, then evaluate usable energy under the permitted discharge, temperature and aging limits.
Can the panel and flood light point in the same direction?
Sometimes, but the best solar-collection angle and the best lighting aim may differ. Verify both at the intended mounting location.
Is a one-night sample test enough?
No. A useful pilot checks output through the night, controller transitions, weak-sun recovery, mounting and environmental condition against predefined acceptance criteria.
Editorial Sources
- New Lights, “Solar Flood Light Premium FL Series”: https://new-lights.com/products/solar-lighting/solar-flood-lights/solar-flood-light-premium-fl-series/
- U.S. Department of Energy, “Solar Photovoltaic System Design Basics”: https://www.energy.gov/cmei/systems/solar-photovoltaic-system-design-basics
- National Renewable Energy Laboratory, “PVWatts Calculator”: https://pvwatts.nrel.gov/
- U.S. Department of Energy FEMP, “Purchasing Energy-Efficient Exterior Lighting”: https://www.energy.gov/cmei/femp/purchasing-energy-efficient-exterior-lighting
- U.S. Department of Energy, “Luminaire Dirt Depreciation: Field Data from Several Exterior Lighting Projects”: https://www.energy.gov/cmei/ssl/articles/luminaire-dirt-depreciation-ldd-field-data-several-exterior-lighting-projects












