


Outdoor lighting installation succeeds when the product, mounting, electrical system, controls and site conditions work as one system. A suitable luminaire can still fail the project if a cable entry faces runoff, a sensor sees reflected light, the bracket cannot hold its aim or nobody records the final settings.
This checklist takes a project from site survey to nighttime commissioning. It focuses on what the project team should verify and record. Permanent electrical work, structural attachment and code compliance belong to appropriately qualified people working from the approved drawings, local requirements and the exact manufacturer instructions.
Start With the Zone and the Acceptance Task
Divide the site into real operating zones before selecting mounting points. A façade, pedestrian route, loading area, parking aisle, service yard and landscaped boundary do not have the same observers or acceptance criteria. For each zone, identify who must see what, when the lighting operates and what must remain outside the lighted area.
Record the decisions that will later be tested: required operating modes, control sequence, emergency interaction, camera viewpoints, property boundaries, maintenance access and any restrictions on spill light. If the project is still deciding between product families, review the outdoor, garden and solar lighting solution before freezing the installation schedule.
| Zone question | Why it matters during installation | Evidence to keep |
|---|---|---|
| What task or object must be visible? | Sets the useful direction and distribution of light | Approved design intent and photometric plan |
| Who observes the zone? | Pedestrians, drivers, cameras and neighbours see different problems | Viewpoints and acceptance walk route |
| When should it operate? | Determines schedules, sensors, overrides and background levels | Control narrative and sequence of operation |
| What must be protected from light? | Helps control glare, windows, property spill and skyward light | Boundary notes, aiming limits and shield details |
| How will it be maintained? | Affects mounting access, isolation, replacement and cleaning | Access method and maintenance plan |
Survey the Actual Site Before Materials Arrive
Compare the drawings with physical conditions. Measure mounting height and offset, inspect the pole or wall, locate the supply and control routes, and note obstacles that alter distribution. Trees, signs, parked vehicles, fences, roof edges and new equipment can all invalidate an earlier layout.
Trace likely water paths rather than treating “outdoors” as one exposure. Look for roof runoff, irrigation spray, standing water, wind-driven rain, condensation cycles, snow or ice, and low points where a connection may sit. Also record dust, salt, chemicals, vibration, impact risk and temperature conditions that affect the required product and accessories.
Access belongs in the survey. The installation position must be reachable with the planned equipment, and the completed site must still allow cleaning, inspection, aiming and component replacement. Resolve discrepancies before drilling, trenching or fabricating brackets.
Match the Exact Product to the Approved Schedule
Read the complete model code on the carton and luminaire. Compare the housing, optic, output package, colour characteristics, input, driver, control option, mounting hardware and accessories with the approved submittal. A catalogue family image cannot establish which configuration arrived.
Environmental markings must be read within their own scope. ANSI/NEMA C136.25 defines ingress protection for roadway and area lighting equipment, while damp/wet-location and enclosure systems may answer different questions. Do not create an unofficial equivalence between rating systems. Check the exact luminaire and every exposed accessory, including photocontrols, sensors, receptacles, driver boxes, glands and field connections.
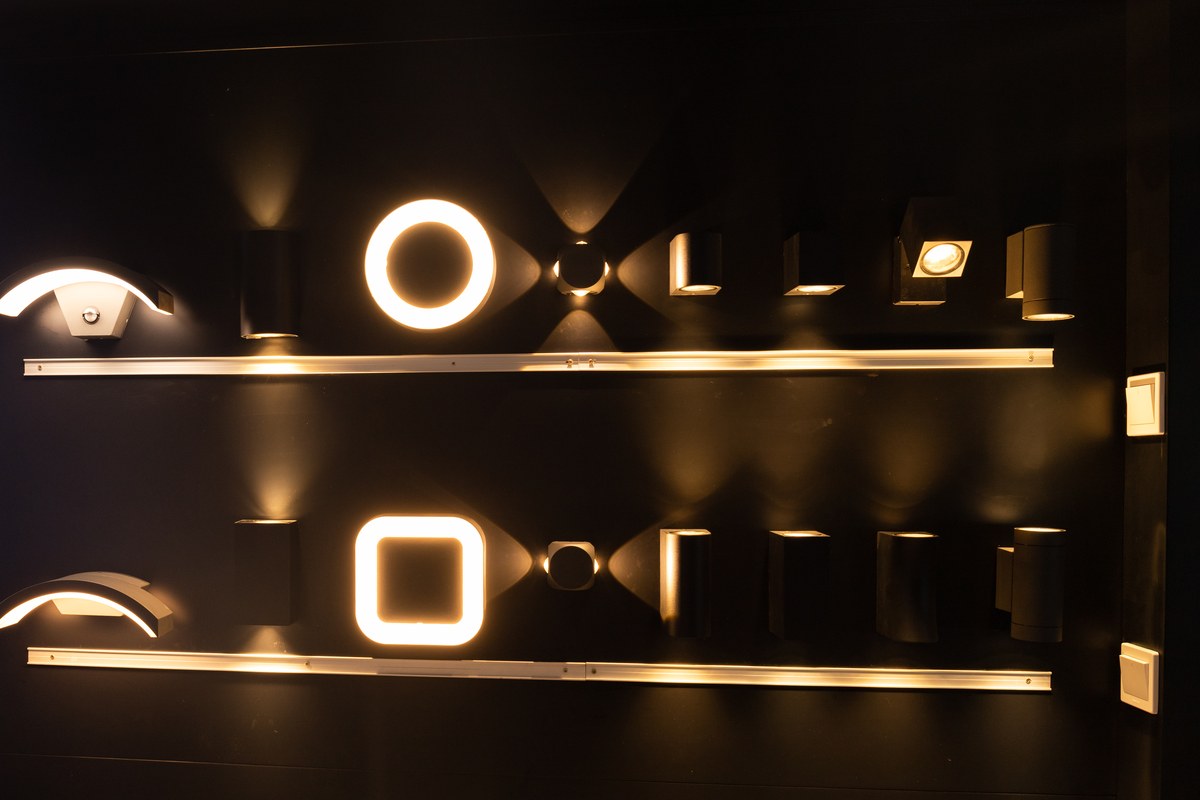
Product identity also controls installation orientation, drainage, heat management and service access. If the delivered item differs from the approved record, stop the installation decision and close the substitution through the project’s change process.
Close Eight Gates Before Handover
The installation sequence is easier to manage as a series of gates. Each gate has a clear output: approved site information, verified product identity, completed mounting and electrical inspection, functional control tests, nighttime acceptance and a usable handover record.
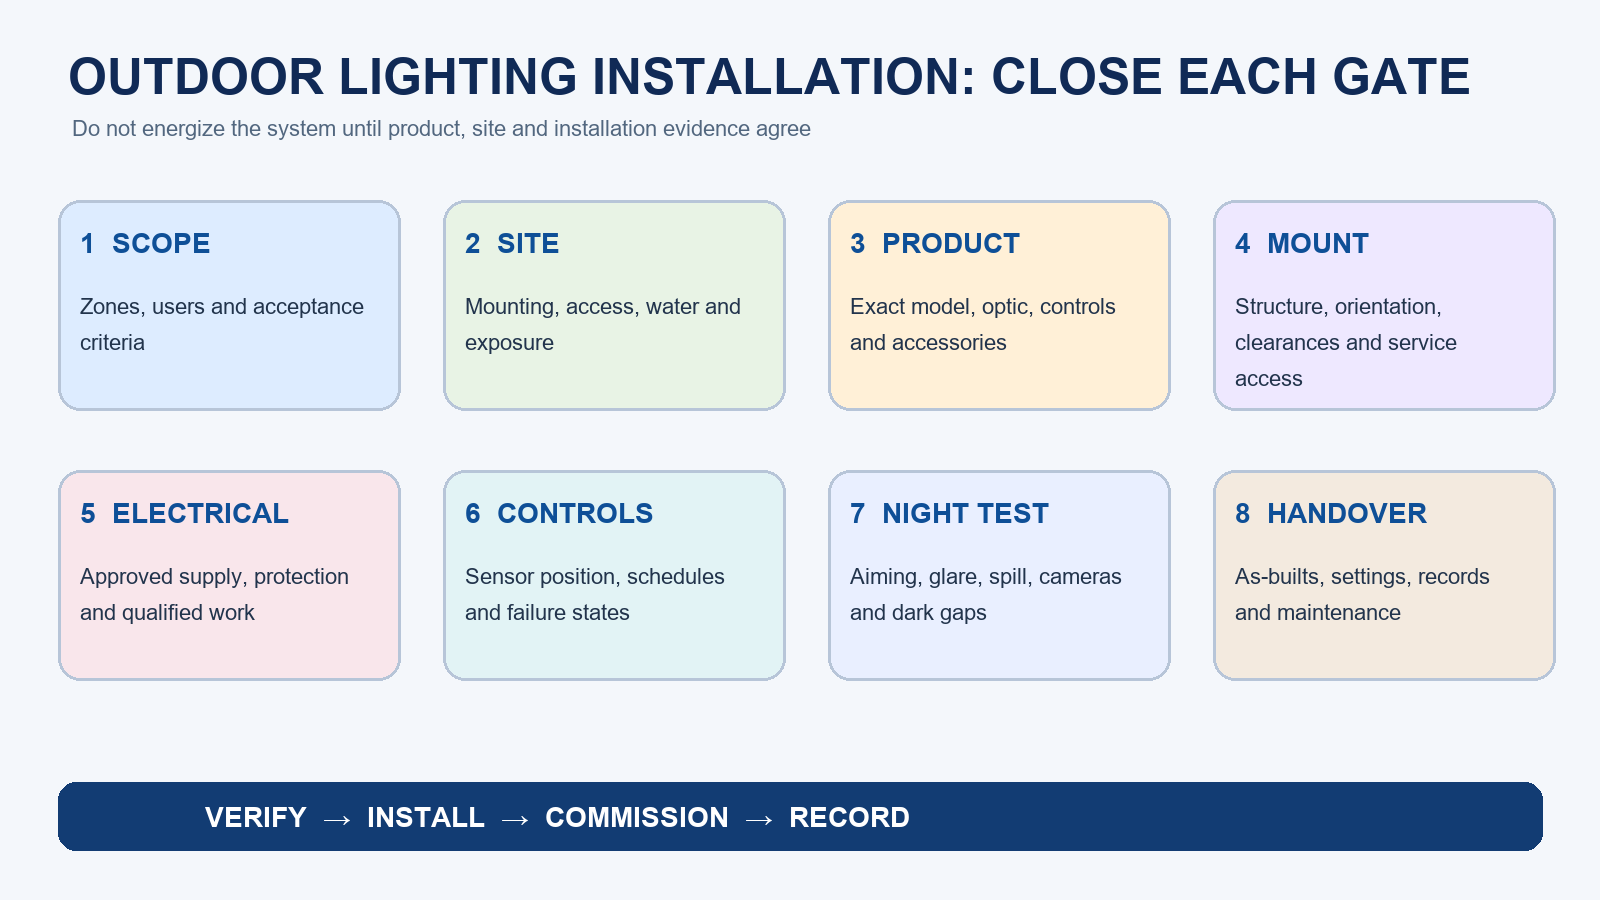
| Gate | Minimum close-out condition | Stop condition |
|---|---|---|
| Scope | Zones, users and acceptance criteria are approved | The task or operating sequence is unclear |
| Site | Mounting, access, exposure and services match the design | Physical conditions conflict with the drawings |
| Product | Exact model, optic, controls and accessories match | Model code or rating evidence is incomplete |
| Mounting | Structure, orientation, clearance and access are accepted | Improvised support or blocked drainage is proposed |
| Electrical | Qualified personnel complete the approved inspection | Damage, exposed conductors or wrong components are found |
| Controls | Every scheduled, sensor and override mode works | Placement or programming causes false operation |
| Night test | Aiming, glare, spill, cameras and dark gaps pass | Daytime energisation is the only acceptance test |
| Handover | As-builts, settings, results and maintenance records are delivered | The owner cannot reproduce the accepted setup |
Install the Mounting System as Designed
Use the mounting method, fasteners and accessories specified for the actual surface and load. Confirm structural capacity, material compatibility and project-specific wind, vibration or impact requirements. Adjustable LED floodlights need hardware that retains the commissioned angle; portable LED work lights need a stable operating position and protected temporary supply.
Do not use the supply cable, conduit or field-made hardware as structural support unless the product is designed and documented for that purpose. OSHA construction rules specifically restrict suspending temporary lights by their cords unless the equipment is designed for it. Keep required clearances open and preserve access to covers, drivers, fasteners and aiming points.
Orientation matters. Rotating a luminaire can change drainage, heat flow, wind loading and optical direction. Before tightening the final hardware, check orientation marks, cable-entry position, drainage features and the expected aiming range.
Manage Water Paths, Entries and Drainage
Water protection depends on the assembled installation, not only the housing. Check the specified gland, gasket, cover, entry thread, cable diameter and tightening method. Route cables so water does not naturally run toward a connection, while maintaining required bend radius and support.
Keep drainage and pressure-equalisation features clear. Extra sealant is not a universal repair: it can interfere with drainage, conflict with materials or conceal a mismatched entry. When a component does not fit, resolve the component and installation detail rather than covering the mismatch.
Condensation and direct water entry require different investigations. Inspect orientation, seals, vents, drainage, temperature cycling and the path of runoff. Record where moisture appears and under which conditions before changing the assembly.
Control Electrical Risk and Temporary Power
The project electrical design defines supply, circuit protection, grounding or bonding, isolation and conductor requirements. Qualified personnel should verify that field work matches that design and the manufacturer instructions before energisation.
Construction power has its own hazards. OSHA requirements for US construction sites address GFCI protection or an assured equipment-grounding programme for defined temporary receptacle use. Apply the rules that govern the actual site rather than turning one construction provision into a universal permanent-installation rule.
Keep temporary cords and connectors away from standing water and traffic, protect them from sharp edges and damage, and remove defective equipment from service. Before power-on, inspect covers, entries, accessible connections, insulation, protective devices and construction debris. Never bypass a protective device to keep the schedule moving.
Commission Controls as an Operating System
Photocells, timers, motion sensors, dimming and networked controls must be tested as a sequence, not as isolated accessories. Confirm sensor position before final fixing. Reflected light, vegetation, passing vehicles, adjacent luminaires and property boundaries can create false or missed events.
Define and test normal schedules, background levels, event levels, delays, overrides and power-restoration behaviour. The DOE exterior-lighting control guidance calls for functional testing of sensor placement and settings, light-sensor response and time-based programming, followed by delivery of as-built and operating records.
For connected systems, record addresses, groups, firmware where relevant, approved settings and the person responsible for future changes. The owner should be able to operate and maintain the system without relying on undocumented installer knowledge.
Aim and Inspect the Installation at Night
GSA guidance recommends directing exterior light to limit light pollution and reduce light trespass. The selected optic, mounting position and shielding should perform most of that work; increasing output is not a substitute for correcting poor direction.
Walk the site after dark from each relevant viewpoint. Check pedestrian routes, driver approaches, camera images, neighbouring windows and property boundaries. Look for direct glare, dark gaps, excessive hot spots, skyward light, reflections and shadows. The companion guide on flood and work lights in outdoor security systems explains why lighting and cameras must be evaluated together.
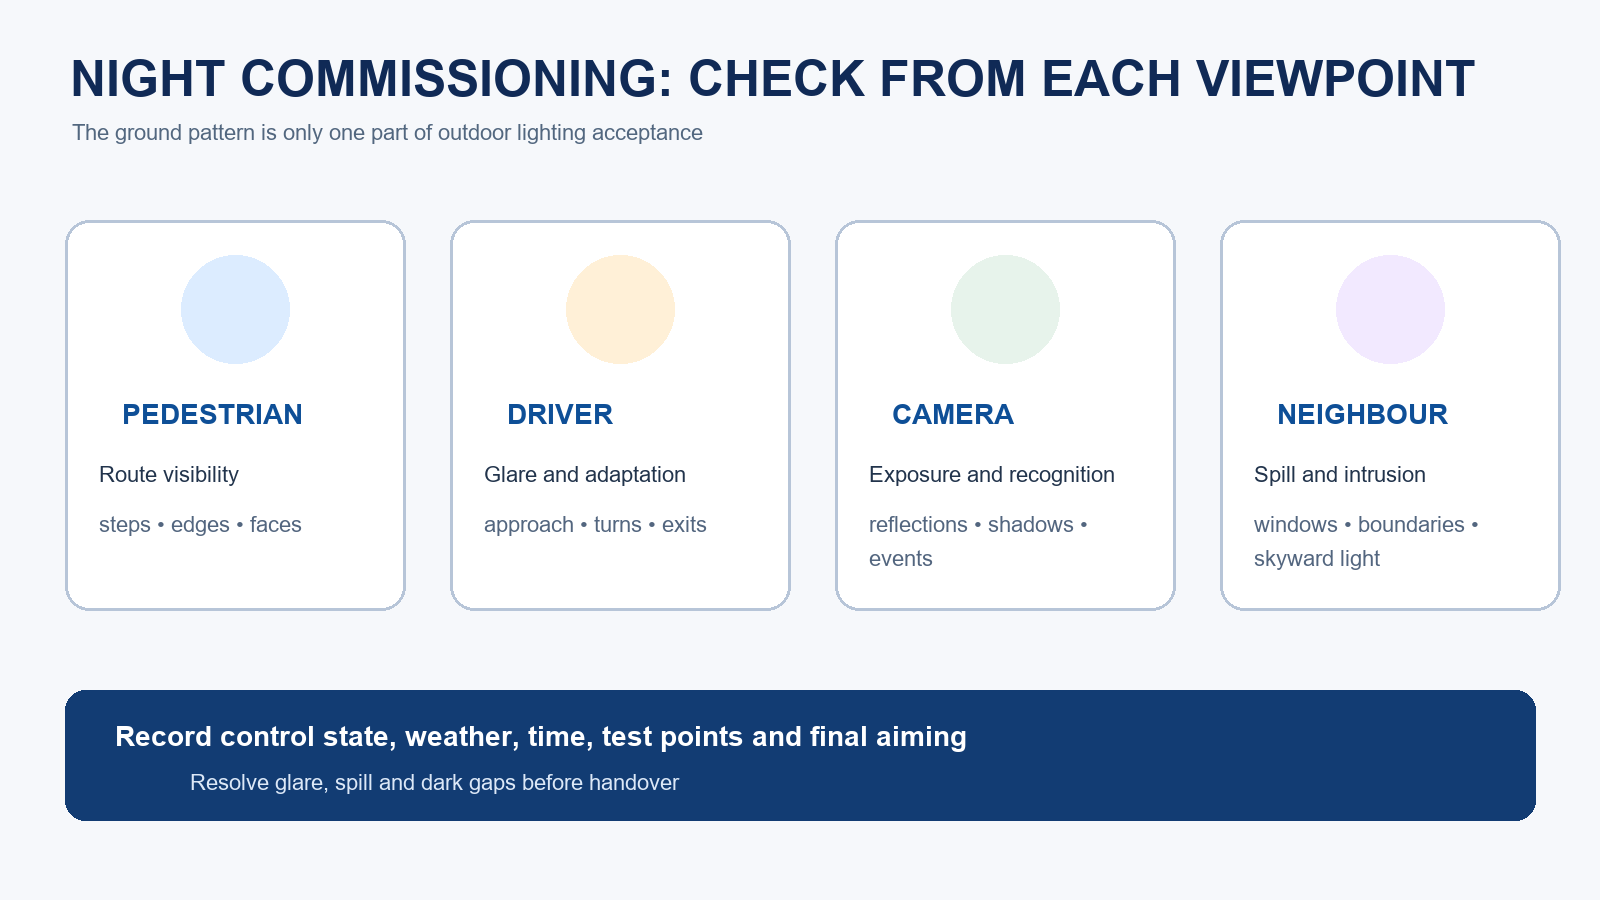
Measure performance using the project method and agreed conditions. Record test points, instrument, weather, time, control state and aiming position. Mark adjustable hardware or capture reference photographs so maintenance teams can restore the accepted aim.
Complete the Handover Record
The handover package connects installation quality to future maintenance. Include the approved product schedule, final submittals, as-built luminaire and circuit locations, control narrative and settings, functional test results, aiming records, operation and maintenance information, warranty documents, spare-part references and inspection schedule.
Train the owner’s team to operate overrides, recognise faults, isolate equipment through the site procedure and request approved replacement parts. Changes to models, optics, controls or aiming should enter the same record rather than becoming invisible field variations.
For project-specific model selection, documentation or sample coordination, review New Lights factory and manufacturing capabilities and send the project brief with the site, target market, mounting, environment, supply, controls and required evidence.
Frequently Asked Questions
Is an IP rating enough to approve an outdoor luminaire?
No. Confirm the exact product, rating scope, mounting orientation, entries, accessories and the requirements that apply to the project. Different environmental-rating systems should not be treated as automatic equivalents.
Can sealant make any field connection weather-resistant?
No. Use the specified gland, gasket, connector and installation method. A mismatched component should be corrected through the approved installation detail.
Who should install permanent outdoor lighting?
People qualified for the electrical, structural and access work should perform it within their legal and technical scope, using the approved drawings and manufacturer instructions.
When should photocells and motion sensors be tested?
Test them after installation under representative conditions. Verify placement, sensitivity, timeout, schedules, overrides, event behaviour and power restoration.
Why is nighttime commissioning necessary?
Night inspection reveals glare, spill, dark gaps, camera interaction and control behaviour that cannot be judged from a daytime power-on check.
What information should an installation review include?
Provide the site and jurisdiction, exact model, drawings, mounting surface and height, environmental exposure, supply, controls, photometric requirements and acceptance method.
Editorial Sources
- U.S. Occupational Safety and Health Administration, “Subpart S — Electrical Standard eTool”: https://www.osha.gov/etools/subpart-s
- U.S. Occupational Safety and Health Administration, “1926.405 — Wiring Methods, Components, and Equipment for General Use”: https://www.osha.gov/laws-regs/regulations/standardnumber/1926/1926.405
- ANSI/NEMA, C136.25-2025 — Ingress Protection for Roadway and Area Lighting Equipment: https://www.nema.org/docs/default-source/about-us-document-library/ansi-nema-c136.25-2025-aspublished.pdf
- U.S. General Services Administration, “Lighting”: https://www.gsa.gov/governmentwide-initiatives/federal-highperformance-buildings/highperformance-building-clearinghouse/energy/lighting
- U.S. Department of Energy Better Buildings, Exterior Lighting Controls Guidance: https://betterbuildingssolutioncenter.energy.gov/sites/default/files/attachments/exterior-lighting-control-guidance.pdf












